


Can you believe it, 2022 is here! Here at Penny Linn Designs we have so many fabulous things up our sleeves including more resources for you, our stitching besties!
@acndlptdesigns has officially launched our Celebrate All of the Things collection. We believe everything in life should be celebrated and we designed these with the intention that needlepoint can live as decoration in your home year round. We hope you'll join the celebration as we continue to evolve this collection!
With that, we designed these as a quick stitch that you can self finish if you choose. Self finishing not your thing? No worries, your finisher can create magic with these cuties.
Below we will guide you on how to finish these or any canvas at home!
Supplies needed: stitched canvas, mat board, cotton batting (or not, I didn't use any for the bunny), curved needle, thread, fabric for backing, tacky glue, optional: cording maker
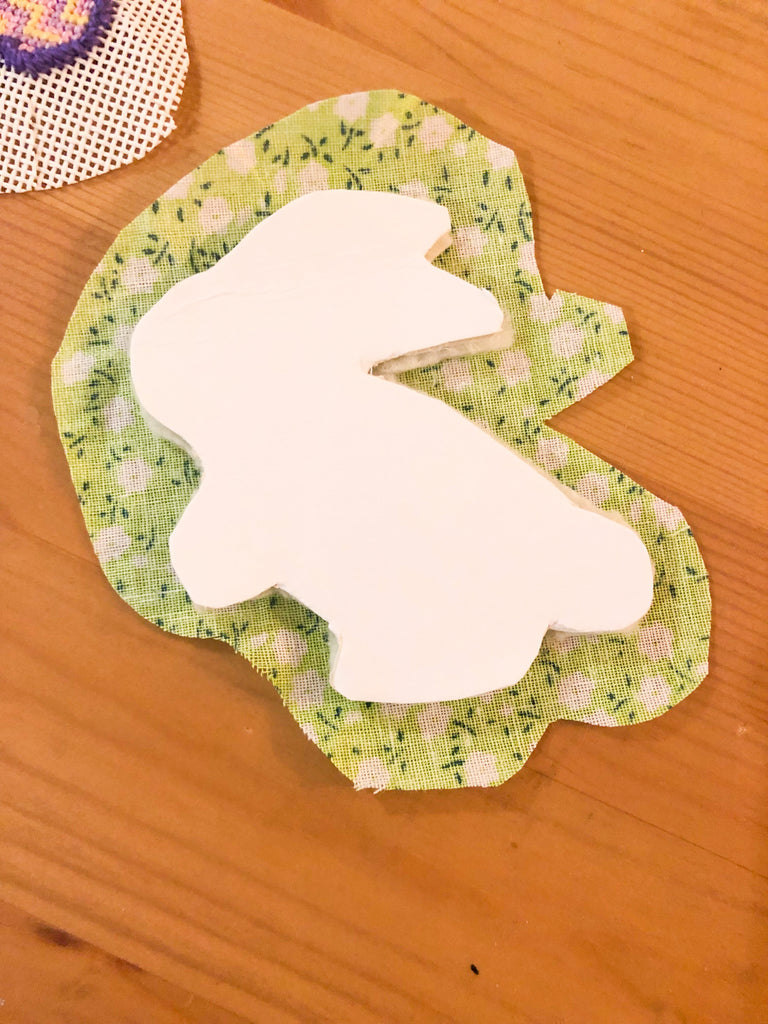
Shown on Celebrate all of the Things - Bunny

*I used @nashvilleneedlepointer Cricut tutorial to complete my inside mat boards.
*Additional video for unique shapes tutorial
1) I used my best judgement doing a "fake" whip stitch around the exterior of the stitched canvas and working my needle along the top of the stitched area. I did this because I didn't want to have cording on the outside. You can also follow @stitchedaf binding tutorial as well.
2) Make photocopy of stitched canvas and trace along the outside with a sharpie
3) Scan photocopy and upload into Cricut maker, delete back ground so it's just the stitched design left. Follow instructions to cut mat board.
4) Cut your photocopy out so you can cut your cotton batting and backing fabric as close as possible to the shape. Cut 1-2 pieces of cotton backing per side depending on how puffy you want your finish.
*No Cricut? No problem! I still suggest making a photocopy of your stitched canvas, cut it out and use that as a guide to cut your mat board and cotton batting.
5) Place batting and board onto the canvas/backing fabric and cut around the outside. Be sure not to cut too close to the stitching, leave 1-2 open holes between stitching and your cuts.
6) Place small amount of glue around the outside, press and hold for 10 seconds, or use clips to hold down.


7) Once you've done this to both sides, remove clips and apply more glue onto one of the sides. Press both pieces (stitched canvas & backing side) together and use clips to hold together. I then thread my curved needle and do a whip stitch moving back and forth sewing the 2 pieces together.
If you don't do the binding or whip stitch on the outside and want to add cording this is where you would add that.
8) Complete cording using a great online tool such as this one from @nashvilleneedlepointer and attach by sewing along the outside of your canvas.
There are so many ways to finish these canvases!
-Finish with a loop to hang on a display stand, holiday tree, etc
-Add velcro to the back and display on your favorite decorative or party platter
-Finish as a patch that can be switched out
-Stitch enough background to finish into a frame
*We found our cookie jar, platters and many other items that could be use for finishing these at Home Goods for under $10 :) *
Cupid can be purchased here!

Bunny can be purchased here!

Turkey can be purchased here!

Lita's new YouTube page is officially LIVE and chalked full of amazing self finishing tutorials. Self finishing times have been cut by hours using Lita's videos, thank you to providing such wonderful resources to stitchers! And THANK YOU for answering my questions when I was too intimidated to break out my Cricut and just try!


