


By Laura Shih (@ShihStitches)
When I first started needlepointing back in April of last year, I had no idea how quickly my love of this craft would grow. It has been an amazing way for me to reduce screen time and to flex my creative muscles (while staying put on the couch at home). While I’ve already collected an impressive collection of canvases from other designers, I found myself wanting to create some of my own, but not knowing how to get started. Enter the Cricut! After my friend posted a video on Instagram showing how she used her Cricut to draw on needlepoint canvas, I knew this was the shortcut I needed.
I’ve received a ton of messages on Instagram since sharing my own process using my Cricut to design canvases, and Krista asked me to put together this blog post to help you all get started too! Don’t be intimidated – not only did I just start stitching in April, I had never used (or even heard of) a Cricut before July. If I can do it, you can too!
What you need:
- A Cricut machine – I have the Explore Air 2! The Cricut Maker would work as well
- Needlepoint canvas – 13 or 18 mesh will work, with the usual logic that 18 is better for smaller more detailed canvases, and 13 is best for larger more basic designs)
- A pen – I use the Cricut Ultimate Fine Point pens (0.4 tip). I like to use a color close to the fiber I’m ultimately going to use (In this case I chose Tawny as I’ll be stitching in gold/nude)
- A Cricut StrongGrip Mat – if you don’t have the strong grip, you can use artist tape to tape the canvas onto the mat
- Artist tape – for taping down your canvas, and also binding the edges once you’re done
- A computer with the Cricut Design Space app installed
- Cardstock/printer paper – to practice your design on before moving to the needlepoint canvas (highly recommend this step if you’ve never tried this before)
- Acrylic paint and small paint brushes – check out Krista’s guides on how to stitch paint a needlepoint canvas, because that is the final step after your Cricut sketches the initial design!

Step 1: Choose your design
Before I go any further into this post, I want to take a second to call out that if you are going to be creating any canvases with your Cricut to please make sure they are original designs, or that you have the rights to use them. For the purposes of this tutorial, I am using a monogram that I purchased off of Etsy that I use as my profile photo for my needlepoint Instagram account!

Step 2: Upload into the Cricut Design Studio and clean up


When my designs have a ton of background detail, like these very intricate stripes, I use the erase feature to remove the stripes that I will add in later when I paint to ensure that they are stitch painted. I also make sure to use the magic wand tool to remove the background.

After:

Click continue, and select “Save as Print Then Cut Image” > Next

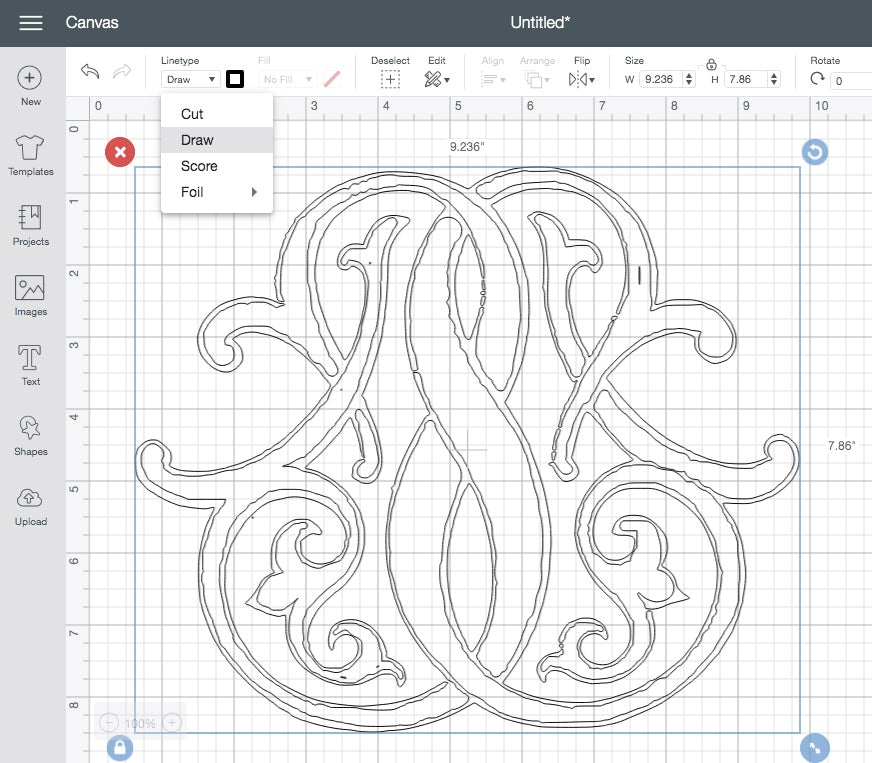
Step 3: Format & Draw!
Choose Linetype = Draw
Step 4: Make it
Re-size the image to the size you want it and click “Make It”!

Center your design using the gridlines depending on the size of your canvas (mine was 9x9”)

On your machine, turn the dial to “Custom”. In the Cricut Design Space app, click “Browse All Materials” and search for “Canvas”


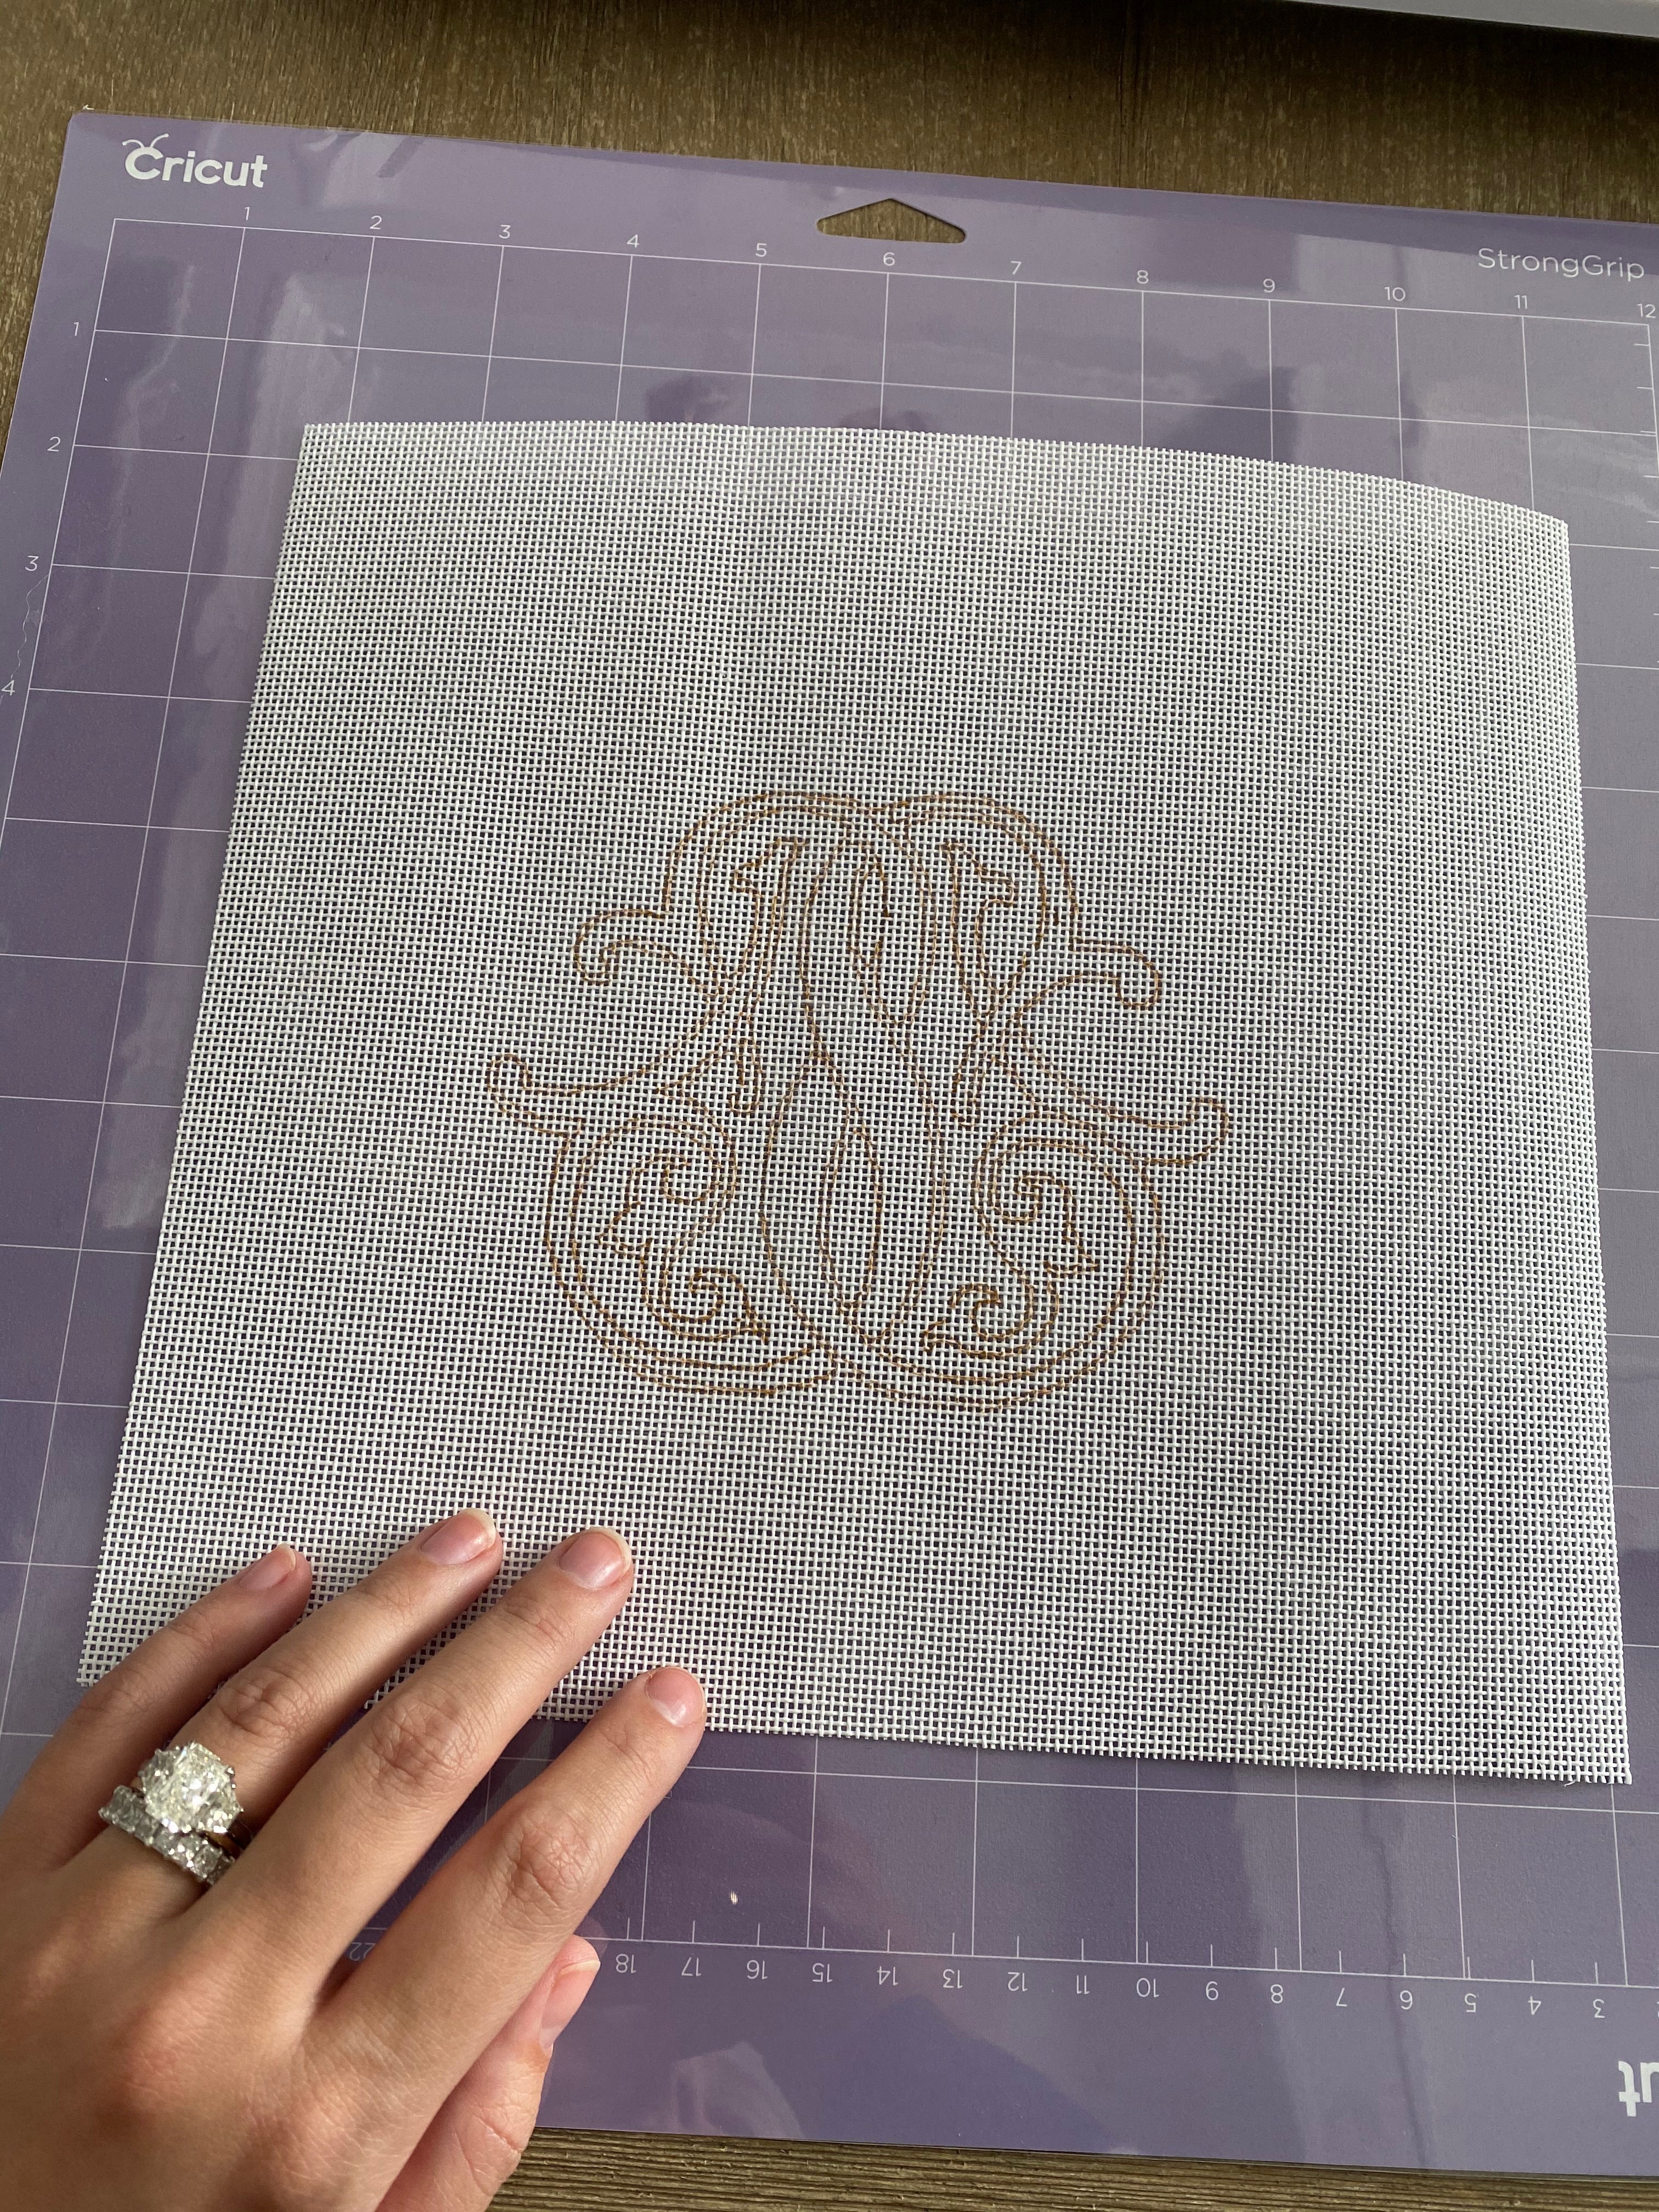
Place your pen into the machine and load your mat once the canvas has been secured.


Load your mat, and then press “Go!”


Voila!
I hope that you found this step-by-step tutorial helpful! I would love to see the canvases you come up with using this process – share with me at @ShihStitches on Instagram!
-Laura


